Introduction
Ever watched an AI video and thought, wait — that actually looks real? That’s exactly the feeling this Kling AI guide is about. Kling AI is an AI video generator known for realistic motion, detailed faces, natural physics and smooth camera work: a person walking through rain, a chef chopping vegetables, a car driving through a night city, all generated from a sentence or a still image. What won creators over is how well its clips hold together compared with many rivals — people keep their shape, objects don’t melt mid-scene, and the motion feels like it was filmed rather than dreamed.
Here’s what you’ll get from this Kling AI guide: what Kling AI can and cannot do, how to sign up and make your first clip, how to write prompts that produce realistic results, how to animate your own images, what it costs, and which mistakes beginners should avoid. If you’re brand new to AI video altogether, read our Runway AI guide first for the general workflow, then come back here for Kling’s specific strengths. For the wider field, see our best AI video generators guide.
Table of Contents
What Is Kling AI?
Kling AI is a video generation platform built by Kuaishou, the company behind the Kwai short-video app. You give it a text prompt, an image, or both, and it generates a short video clip — typically five to ten seconds — with motion, camera movement and realistic detail. You can also extend clips, generate video from a starting and ending frame, and tweak settings such as creativity, quality and aspect ratio for different platforms.
Why do people love it? Two reasons, really. First, realism: faces, hands, clothing and everyday objects stay consistent across frames far better than in early AI video tools. Second, value: for the quality it produces, Kling AI is often more affordable per clip than its cinematic rivals, which makes it a natural fit for creators who publish video daily. That combination — realistic output at a creator-friendly price — is why it’s a favourite for social media ads, YouTube b-roll, product demos, music visuals and short-form content.
Want a head-to-head with the other realism-focused tool? Read our Luma Dream Machine guide — the two tools are often chosen for the same jobs, and the differences genuinely matter when you’re picking one.
Step 1: Sign Up and Make Your First Clip
Getting started is genuinely straightforward. Head to klingai.com and create a free account, then open the video generation tool and pick text-to-video or image-to-video. Next, type a prompt that covers the subject, the action and the camera — something like, “A chef chopping fresh vegetables in a bright modern kitchen, camera slowly moving closer, warm natural light.” Then generate your clip, watch it right through, and download the version you like best.
Don’t worry if your first clip isn’t perfect — honestly, that’s completely normal. AI video gets better fast once you learn to describe motion and camera work clearly. A prompt that just says “a beach” gives you a nearly still scene; one that says “waves rolling onto a sandy beach at sunset, camera slowly moving forward, golden light” gives you a video that actually feels alive. Start with simple, single-action scenes before you attempt anything complex.
Step 2: Write Prompts That Produce Realistic Video
A strong Kling AI prompt has five parts: subject, action, setting, camera and style. Most beginners write only the subject, then wonder why the clip barely moves — so use all five, every time.
Subject: who or what is actually in the shot? Get specific — “a young cyclist in a red jacket” will beat “a person” every time. Action: what moves, and how? “Cycling fast down a city street, jacket fluttering in the wind” gives the model real motion to work with. Setting: where and when? “At dawn in a quiet old town” brings light, mood and detail with it. Camera: how should the camera move? Try “slow push-in”, “camera pans left”, “drone shot rising” or “steady tracking shot”. Style: how should it look? Try “cinematic”, “realistic 4K look”, “documentary” or “animated film style”.
And here’s one rule that matters more than any other: one action per clip. Asking for a person to run, jump, wave and turn in five seconds usually produces a mess. Generate one clean action, then generate the next action as a separate clip and edit them together. Short, clean clips edited well consistently beat one long, confused clip, making this the more reliable approach for clear, watchable results.
Step 3: Animate an Image With Image-to-Video
Image-to-video is where Kling AI really shines for bloggers and creators. Upload a still image — ideally one you made with Midjourney, Leonardo or Ideogram — and describe the motion you want. A product photo becomes a rotating demo, a poster becomes a moving ad, and a fantasy illustration becomes a film scene. Kling AI also supports first-and-last-frame generation, where you upload a starting image and an ending image and the model creates the motion between them — perfect for smooth transitions and before-and-after reveals.
Start gentle: a slow camera push-in, drifting clouds, flowing water, or a character turning their head. Big, fast actions are harder for any AI video model, so build your confidence with subtle motion first. If the result looks warped, simplify the prompt, shorten the action, or try a different starting image with a clearer subject and less clutter. If you need those starting images, our Midjourney guide and our Ideogram guide show how to make them.
This workflow is also the cheapest way to work: one good image can become several different clips just by changing the motion prompt. Save your best starting images — they’re reusable assets for future videos, so you won’t be starting from scratch every time.
Step 4: Edit, Extend and Finish Your Video
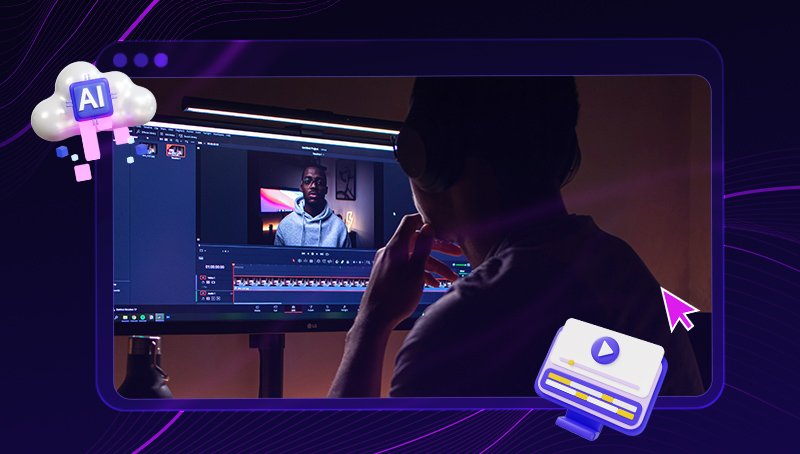
One clip on its own is rarely a finished video. Here’s a simple finishing workflow to turn your Kling AI clips into something properly publishable. Trim the edges: AI video often wobbles in the first and last frames, and cutting those frames instantly makes a clip look more professional.
Stitch clips together: combine several short clips in Kling AI or a normal editor such as CapCut, keeping one consistent style and colour across clips. Add sound: music, narration or sound effects make a silent AI clip feel finished — and a silent clip feels unfinished, however good the visuals are. Add captions and a thumbnail: captions keep viewers watching on mute, and a strong thumbnail — made with our Ideogram guide techniques — gets the click in the first place.
Keep your edits simple at first. Clean cuts, consistent colour and one music track beat flashy transitions every time, and they hide the small imperfections that AI video still has. If you’re a beginner, start with this simple finish before you try anything fancy.
Kling AI Pricing: What to Expect
Kling AI offers a free plan with limited daily credits, plus paid plans with more credits, faster generation, higher resolution and commercial-use options. Video generation uses far more computing power than image generation, so free credits run out faster than you might expect — run short tests first, and only spend credits on a full clip once your prompt works. For most creators, the free plan is plenty to learn the tool and make a few social clips. If you publish video daily, a paid plan is usually worth it — but start free, learn which prompts work, and upgrade only when you regularly run out of credits. Always check klingai.com for current plans, because credits and prices change.
Common Kling AI Mistakes Beginners Make
Prompts with no motion: describe the action and the camera, not just the scene. Too many actions in one clip: stick to one clean action per clip, then edit clips together. Using the first generation as final: generate a few versions, pick the best, and trim the wobbly frames. Expecting long films: AI video works best as short clips — five to ten seconds each — stitched into a longer video. Ignoring sound: add music or narration before publishing. Forgetting the rules: check Kling AI’s terms for commercial use, and never generate misleading deepfakes of real people.
Kling AI vs Other AI Video Tools
Kling AI leads on realistic, consistent motion at a creator-friendly price — which is why daily social creators keep choosing it. Luma Dream Machine, covered in our Luma Dream Machine guide, is a close rival on cinematic realism, while Runway AI, covered in our Runway AI guide, offers stronger editing and camera-control tools for filmmakers. Compare the full field in our best AI video generators guide, and explore our comprehensive guide to free AI tools for free tools to pair with your videos.
Frequently Asked Questions
Is Kling AI free? Yes — there is a free plan with limited daily credits, and paid plans add more credits and features. How long can a Kling AI video be? Individual clips are usually five to ten seconds, but you can extend clips and stitch them into longer videos in an editor. Can I use Kling AI videos commercially? Paid plans generally support commercial use, but check Kling AI’s current terms for your plan before client work.
Is Kling AI better than Luma or Runway? For realistic daily social video at a good price, Kling AI is among the best. For cinematic work, compare Luma; for advanced editing, compare Runway. Do I need video editing experience? No — you can generate clips with prompts alone, and basic trimming plus music is enough for a first publishable video.
Final Thoughts
So, this Kling AI guide really comes down to a simple workflow: one clear action per clip, gentle motion first, trim the wobbly frames, and stitch good clips into a finished video with sound. Do that, and you can publish realistic video content without a camera crew — starting today. For your next step, read our Luma Dream Machine guide to compare the closest rival, or explore our Runway AI guide for a stronger editing workflow.
And for a fast short-form finish, see our CapCut AI guide.